If you’re tired of chipped polish or lifting gel nails, mastering nail layering is your secret weapon. Whether you’re into gel polish or polygel, the key to salon-worthy nails that last lies in the layering technique.
In this post, I’ll walk you through a 6-step nail layering routine that strengthens adhesion, enhances durability, and leaves your nails looking flawless for weeks.
How to Layer Your Nails: A Step-by-Step Tutorial
🛠️ What You’ll Need:
Nail file & buffer
Nail dehydrator
Nail primer
Base coat
Gel polish or polygel
Top coat
UV/LED curing lamp
🔢 Step-by-Step Process
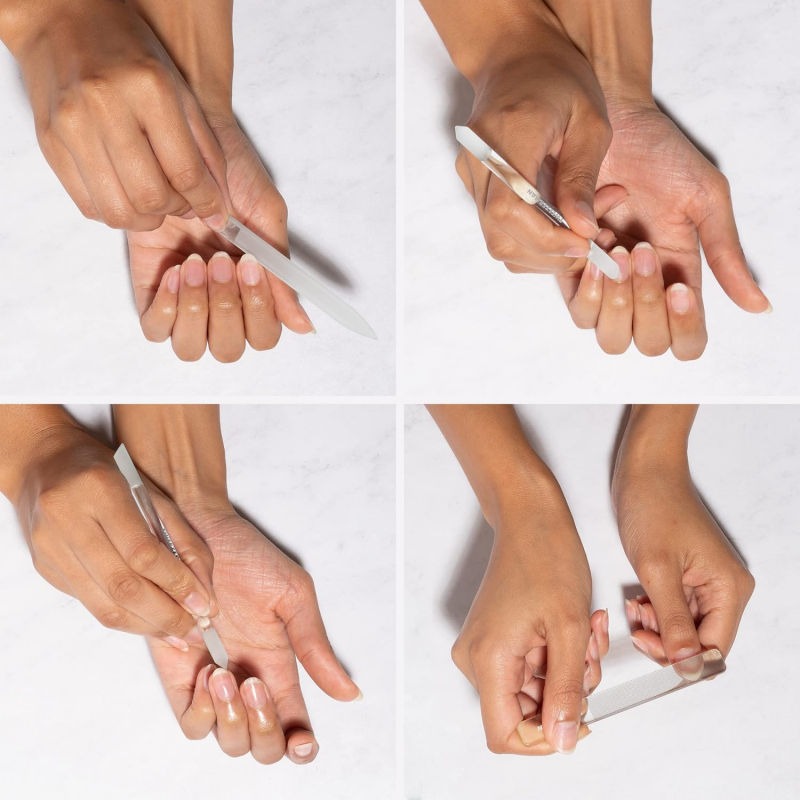
💅 1. Prep Your Nails
1. Prep Your Nails
Before you apply any product, it’s crucial to start with a clean, well-prepped nail surface. This step sets the foundation for how well your gel or polygel will adhere — and ultimately, how long your manicure will last.
What to Do:
Remove any old polish using a non-acetone remover if you’re working on natural nails.
File your nails into your desired shape (square, almond, oval, etc.).
Use a buffer block to gently remove the shine from the natural nail — this helps the product grip better.
Don’t forget to push back your cuticles and trim any dead skin. This prevents lifting near the nail base.
Wash and dry your hands thoroughly before moving to the next step.
💡 Pro Tip: Avoid soaking your nails in water before starting — moisture can cause lifting later on.
Affiliate disclosure: As an Amazon Associate, we earn from qualifying purchases. This does not influence our reviews and comparisons.
Tweezerman Glass Nail Care Set Includes tools for cuticle maintence, nail shaping and shining. Glass material is gentle on nails, durable and reusable.
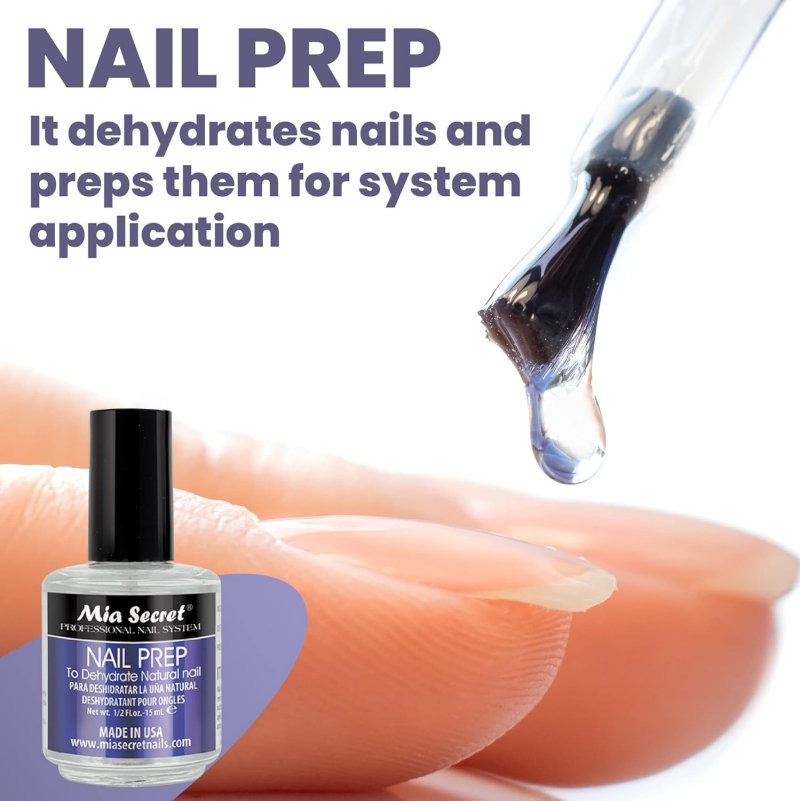
💧 2. Nail Dehydrator
This step is often skipped — but it makes a big difference! A nail dehydrator removes excess moisture and oil from your natural nail plate, creating a clean canvas for primers and base coats to grip onto.
How to Use It:
Apply a small amount of nail dehydrator to a lint-free pad or use the brush provided.
Lightly swipe the product over the entire surface of each nail.
Let it air dry for 2 seconds. It will quickly evaporate, leaving your nail surface matte and dry-looking.
🧴 Recommended For: Oily nail beds, humid climates, or anyone who struggles with lifting.
🧪 3. Nail Primer
After dehydrating, a nail primer is your next best defense against peeling and lifting. It acts like double-sided tape, bonding the natural nail to the product layers above it.
There are two types:
Acid-free primer: Gentler, suitable for most users
Acid-based primer: Stronger bond, used for problematic or oily nails
How to Use It:
Apply a very thin coat to the natural nail only (avoid touching the skin).
Allow it to air dry for 20 seconds. It will become slightly tacky, not wet.
Now your nails are perfectly primed and ready for the base coat!
⚠️ Note: Do not over-apply primer — too much can cause lifting or irritation.
🧷 4. Base Coat
The base coat is the essential bonding layer between your natural nail and the polish or polygel. It smooths out imperfections, prevents staining, and helps your manicure last significantly longer.
How to Use It:
Apply a thin, even layer of base coat over the entire nail surface.
Be sure to cap the free edge (the tip of your nail) to prevent early chipping.
Avoid flooding the cuticle area — product should not touch the skin.
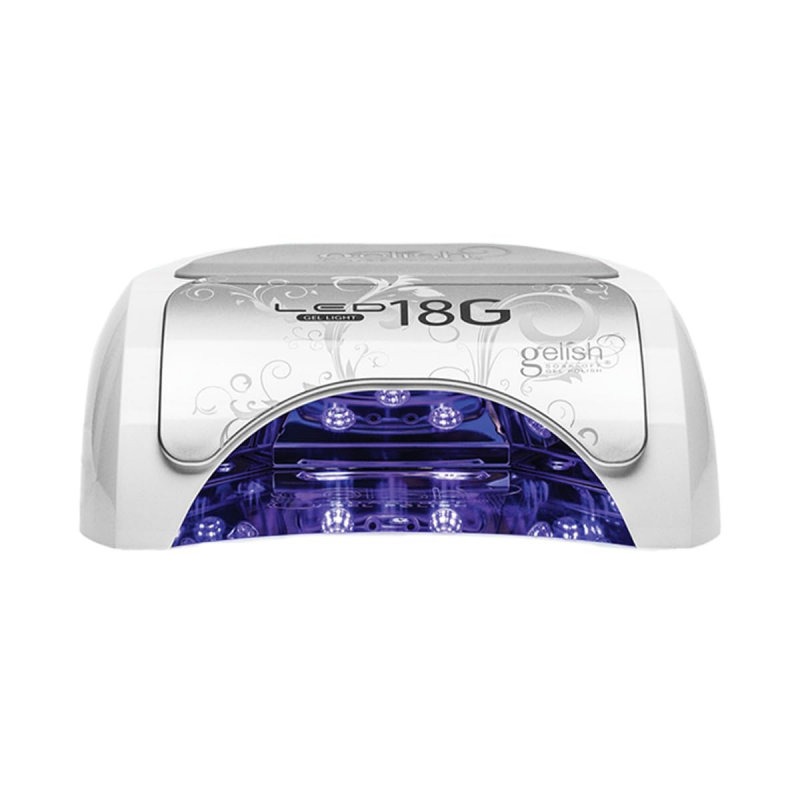
Cure Time:
Place your nails under a UV/LED lamp for 30 seconds (longer if your lamp requires it).
Gelish 18G Classic LED Light - Professional Nail Curing Lamp
Gelish 18G Classic LED Light - Professional Nail Curing Lamp
💡 Pro Tip: Wiggle your fingers slightly under the lamp to ensure even curing, especially near the sides of the nails.
🎨 5. Gel Polish or Polygel
Now comes the fun part — adding color or structure! Whether you’re using gel polish for a vibrant finish or polygel for extra strength and shape, this step brings your manicure to life.
If Using Gel Polish:
Apply one thin coat of gel color.
Cure for 30 seconds under the lamp.
Repeat with a second coat for full opacity, curing each time.
If Using Polygel:
Use a spatula to place a small bead of polygel on your nail.
Dip your brush in slip solution and shape the product to fit your nail.
Once satisfied, cure for 30–60 seconds depending on the thickness.
🖌️ Tip: Thin, even layers are key — thick coats may wrinkle or not cure properly.
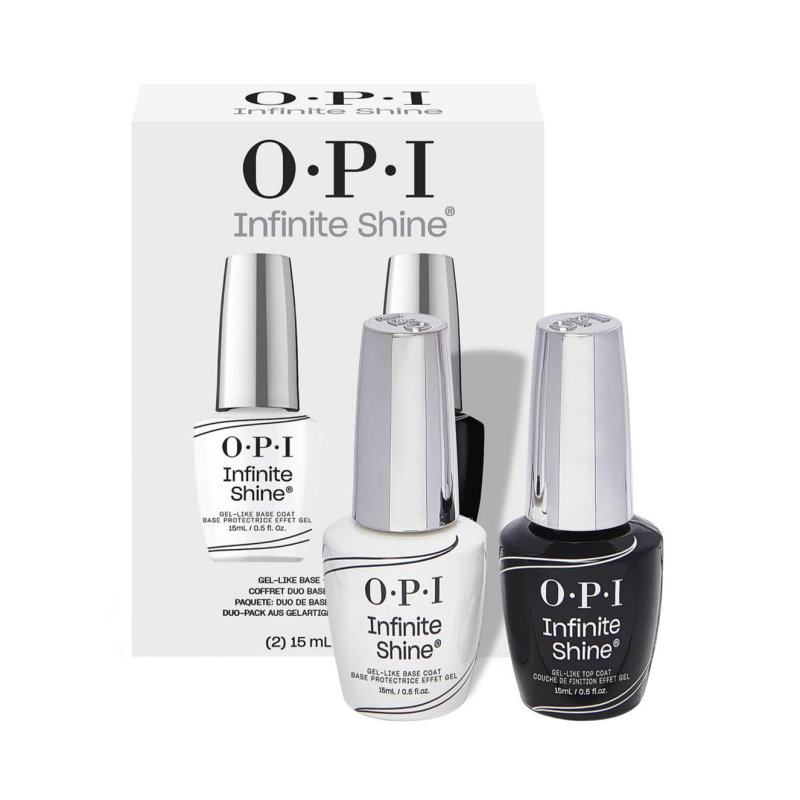
✨ 6. Top Coat
The final step is sealing your hard work with a top coat. It locks in the color, adds brilliant shine (or a matte finish if you prefer), and protects against chips and scratches.
How to Use It:
Apply a thin, smooth layer across each nail, again capping the edges.
Ensure it’s not too thick or it may bubble during curing.
Cure Time:
Cure under a UV/LED lamp for 30 seconds.
Final Touch:
If your top coat leaves a sticky inhibition layer, use a lint-free wipe soaked in rubbing alcohol to gently remove it.
OPI Gel Like Nail Polish Base Coat & Top Coat
OPI Infinite Shine Gel Like Nail Polish Base Coat & Top Coat
💎 Bonus Tip: Want extra durability? Apply a second top coat layer and cure again for maximum protection.
✅ Aftercare Tips:
Wipe with alcohol if the top coat feels tacky.
Apply cuticle oil to nourish the surrounding skin.
Avoid water for 1 hour to ensure full curing.
💖 Final Thoughts
Layering your nail products properly transforms your at-home manicure into a long-lasting, salon-grade experience. The key? Don’t skip the prep steps, and always cure thoroughly. With this method, you can enjoy chip-free nails that last 2–3 weeks!
Subscribe to our newsletter
💌 Love skincare that works? Want more beauty tips?
Join us for weekly product picks, expert skincare advice, and exclusive beauty finds!